- Published on
一起学Android-布局
- Authors

- Name
- noodles
- 每个人的花期不同,不必在乎别人比你提前拥有
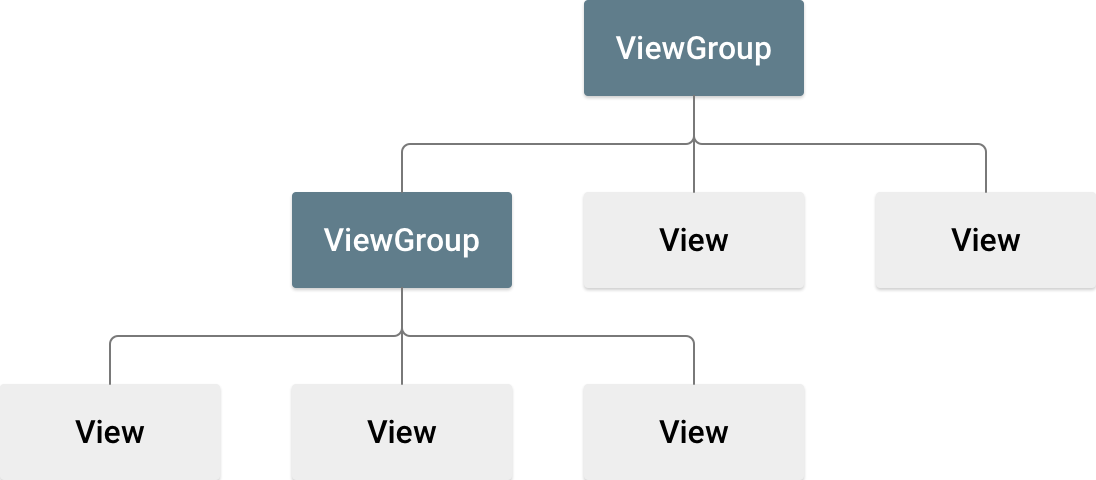
安卓的页面是通过ViewGroup + View的组合来实现。
- ViewGroup是布局容器,它定义内部视图的展示方式。
- View是视图组件,例如Button、TextView等。
LinearLayout(线性布局)
LinearLayout会将它包含的元素按照水平或者垂直方向线性排布。
LinearLayout布局属性
| 属性 | 值 | 含义 |
|---|---|---|
| android:orientation | horizontal/vertical | 水平/垂直布局 |
| android:gravity | left、right、top等 | 定义内部元素的对齐方式,默认left |
LinearLayout子控件属性
| 属性 | 值 | 含义 |
|---|---|---|
| android:layout_weight | 数字 | 布局权重,结合layout_width可以实现均等分布 |
| android:layout_gravity | left、right、top等 | 定义组件在非主轴上的对齐方式,会影响父布局gravity的作用 |
RelativeLayout(相对布局)
RelativeLayout是以相对位置显示子视图的视图组,每个视图的位置可以指定为相对于同级元素的位置或者相对于父级的位置。
RelativeLayout子控件属性
| 属性 | 含义 |
|---|---|
| android:layout_alignParentXXX | 相对于父元素的位置对齐 |
| android:layout_below/above | 定位在指定视图的上面或下面 |
| android:layout_toXXXOf | 定位到指定视图的左右边缘 |
ConstraintLayout
ConstraintLayout与RelativeLayout相似,视图均根据同级视图与父布局之间的关系进行布局。在ConstraintLayout中定义的视图必须至少添加一个水平约束条件和一个垂直约束条件。ConstraintLayout的布局方式能有效的解决嵌套问题,优化页面性能。
ConstraintLayout子控件属性
| 属性 | 含义 |
|---|---|
| android:layout_constraintXXX_toXXXOf="id/parent" | 相对于另一个元素或者容器布局 |
| android:layout_marginXXX | 定义外边距 |
| android:layout_constraintXXX_bias | 通常用与调整视图水平/垂直位置 |
| android:layout_goneMarginXXX | 定义当相对视图不可见时候的边距 |
| android:layout_minXXX / maxXXX | 定义组件的宽度限制条件 |
| android:layout_constraintXXX_percent | 百分比布局 |
自定义视图
在业务开发中,不同页面的组件能力共享能有效减少业务逻辑的重复。下面以一个按钮为例子了解创建自定义视图的流程。
创建组件
新建一个类继承LinearLayout并且在构造函数中引用按钮的布局。
    // 类文件
    public class button extends LinearLayout {
        public button(Context context, AttributeSet attrs) {
            super(context, attrs);
            // 指定按钮的布局
            LayoutInflater.from(getContext()).inflate(R.layout.button, this);
            Button button = (Button) findViewById(R.id.button1);
            button.setOnClickListener(new OnClickListener() {
                @Override
                public void onClick(View v) {
                    Toast.makeText(getContext(),"toast", Toast.LENGTH_LONG).show();
                }
            });
        }
    }
    // 按钮的布局文件
    <?xml version="1.0" encoding="utf-8"?>
    <LinearLayout xmlns:android="http://schemas.android.com/apk/res/android"
        android:orientation="vertical"
        android:layout_width="match_parent"
        android:layout_height="match_parent">
        <Button
            android:layout_width="wrap_content"
            android:layout_height="wrap_content"
            android:id="@+id/button1"
            android:text="button"
        />
    </LinearLayout>
使用组件
    <?xml version="1.0" encoding="utf-8"?>
    <LinearLayout xmlns:android="http://schemas.android.com/apk/res/android"
        android:layout_width="match_parent"
        android:layout_height="wrap_content">
        // 通过类名使用组件
        <com.example.learnlayout.button
            android:layout_width="wrap_content"
            android:layout_height="wrap_content"
            title="clickMe"
        />
    </LinearLayout>